Hi readers !! In our previous article, we have shared and awesome “Related post widget for blogger” and now we bring’s you another cool Blogger widget which will help you to reduce your blog’s bounce rate. As we know that the “Popular post widget” is the most common but compulsory widget to have in your blog. It display’s some of the most viewed articles of your blog. The default popular post widget provided by blogger, works perfect but it looks little old fashioned and dull. So in today’s tutorial, we will learn how could you give a professional touch into the widget by adding some simple CSS coding in your template. if you want to see the demo, then take a look on our popular post widget.
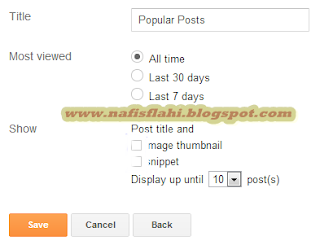
In this post I’m presenting beautiful Popular post style for blogger first you need to add popular post widget into your blog for add it You should go Layout ,then Click on the add widget after that select popular post widget,
and you can also select how many post would you like to show in popular post
3..Now Find ]]></b:skin> to find it press CTRL + F
4 Copy and Past the below Code Just above ]]></b:skin>
.popular-posts ul{padding-left:0px;}
.popular-posts ul li {background: #FFF url(http://4.bp.blogspot.com/-oOVUW06ghgo/UHwuqL9TltI/AAAAAAAAGKU/Nj4DQnvft8k/s1600/1.gif) no-repeat scroll 5px 10px;
list-style-type: none;
margin:0 0 5px 0px;
padding:5px 5px 5px 20px !important;
border: 1px solid #ddd;
border-radius:10px;
-moz-border-radius:10px;
-webkit-border-radius:10px;
}
.popular-posts ul
li:hover {
border:1px solid #6BB5FF;
}
.popular-posts ul
li a:hover {
text-decoration:none;
}
.popular-posts .item-thumbnail img {
webkit-border-radius: 100px;
-moz-border-radius: 100px;
border-radius: 100px;
-webkit-box-shadow: 0 1px 3px rgba(0, 0, 0, .4);
-moz-box-shadow: 0 1px 3px rgba(0, 0, 0, .4);
box-shadow: 0 1px 3px rgba(0, 0, 0, .4);
}


